Categories

1 (1) 2 (1) 2000 (1) 2003 (1) 3 (1) 301 (1) 302 (1) 405 (1) 503 (1) 7 (2) 8 (1) 95 (1) 98 (1) acquiadrupal (2) alexa (1) alleycode (1) amaya (1) Apple (1) aptana studio (1) AVG (1) avira (1) beta (1) bird (1) blog (24) bluefish (1) chrome (1) CMS (2) comodo (1) driver (1) eclipse (1) facebook (7) free (19) FTP (2) gateway (4) google (9) harddisk (3) hosting (1) HTML (8) Joomla (5) komodo (1) kompozer (1) linux (1) mac os (1) magento (1) microsoft (4) mobile (1) moziila firefox (1) notepad++ (1) NT (1) odyssey (1) Os-commerce (4) panda (1) payment (4) perl (1) php (2) ping (1) ppc (1) prestashop (1) PS pad (1) PTC (1) rank (3) seamonkey (1) Seocentro (1) Sertificate (1) SSL (2) template (2) thumbnail (1) Twitter (4) vista (1) widget (15) windows (16) wordpress (2) XP (7) zencart (1)

Popular Posts

Wednesday 29 February 2012

Missing DLL or driver on Windows

Do you always send the message in the windows pop up that your program can not be run because missing the DLL file (driver file), so you can write about the missing DLL  in thatt windows message pop up. find it in the your browser and download them in your computer .
WE have suggested this website link for find your missing DLL (Nodevice.com), or you can search on your browser about "DLL driver / file"
after that you can do this step to instal on your computer
  1. Uncompress the DLL downloaded file from DLL-Downloads.com to your system32 folder within the Windows folder.  [c:\WINDOWS\system32]
  2. Click on the Start button, then click the Run... option
  3. In the "Open" line, type the following (without quotes) "regsvr32 filename.dll" (replace filename.dll with the actual filename of the file you downloaded), then click the "OK" button.


  4. How to Install a DLL file?

  5. If the installation was successful, you should see a message saying that your file was successfully installed/uninstalled.

    How to install a DLL file? - Use regsvr32 installation command

Check Your Hard Disk For Errors

Check Your Hard Disk For Errors

When using your computer regularly you need to keep up with computer maintenance and to check you hard disk drive for errors is one of those tasks. Your hard disk drive is where everything is stored on your computer so to say the hard drives performance is important is an understatement.
You can not only help solve some computer problems but you can also improve the performance of your computer by making sure that your hard disk has no errors.
1.  Open Computer by clicking the Start button , and then clicking Computer.
2.  Right-click the hard disk drive that you want to check, and then click Properties.
3. Click the Tools tab, and then, under Error-checking, click Check Now.  If you are prompted for an administrator password or confirmation, type the password or provide confirmation.

What does Windows error checking do?

To automatically repair problems with files and folders that the scan detects, select Automatically fix file system errors. Otherwise, the disk check will simply report problems but not fix them.
To perform a thorough disk check, select Scan for and attempt recovery of bad sectors. This scan attempts to find and repair physical errors on the hard disk itself, and it can take much longer to complete.
To check for both file errors and physical errors, select both Automatically fix file system errors and Scan for and attempt recovery of bad sectors.
Depending upon the size of your hard disk, this may take several minutes. For best results, don’t use your computer for any other tasks while it’s checking for errors.

Instal windows XP part 4


Step 19 - Finally Windows will start and present you with a Welcome screen. Click next to continue.
Windows XP Screenshot - Click to enlarge
Step 20 - Choose 'help protect my PC by turning on automatic updates now' and press next.
Windows XP Screenshot - Click to enlarge
Step 21 - Will this computer connect to the internet directly, or through a network? If you are connected to a router or LAN then choose: 'Yes, this computer will connect through a local area network or home network'. If you have dial up modem choose: 'No, this computer will connect directly to the internet'. Then click Next.
Windows XP Screenshot - Click to enlarge
Step 22 - Ready to activate Windows? Choose yes if you wish to active Windows over the internet now. Choose no if you want to activate Windows at a later stage.
Windows XP Screenshot - Click to enlarge
Step 23 - Add users that will sign on to this computer and click next.
Windows XP Screenshot - Click to enlarge
Step 24 - You will get a Thank you screen to confirm setup is complete. Click finish.
Windows XP Screenshot - Click to enlarge
Step 25. Log in, to your PC for the first time.
Windows XP Screenshot - Click to enlarge
Step 26 - You now need to check the device manager to confirm that all the drivers has been loaded or if there are any conflicts. From the start menu select Start -> Settings -> Control Panel. Click on the System icon and then from the System Properties window select the Hardware tab, then click on Device Manager.
Windows XP Screenshot - Click to enlarge
If there are any yellow exclamation mark "!" next to any of the listed device, it means that no drivers or incorrect drivers has been loaded for that device. In our case we have a Video Controller (VGA card) which has no drivers installed.
Your hardware should come with manufacturer supplied drivers. You need to install these drivers using the automatic setup program provided by the manufacturer or you need to manually install these drivers. If you do not have the drivers, check the manufacturers website to download them.
To install a driver manually use the following procedure:
(a) From the device manager double click on the device containing the exclamation mark.
(b) This would open a device properties window.
(c) Click on the Driver tab.
(d) Click Update Driver button. The Wizard for updating device driver pops up as shown below:
Windows XP Screenshot - Click to enlarge
You now get two options. The first option provides an automatic search for the required driver. The second option allows you to specify the location of the driver. If you don't know the location of the driver choose the automatic search which would find the required driver from the manufacturer supplied CD or Floppy disk. Windows would install the required driver and may ask you to restart the system for the changes to take affect. Use this procedure to install drivers for all the devices that contain an exclamation mark. Windows is completely setup when there are no more exclamation marks in the device manager.


and when you need some trouble here you can follow this help form 


 <<Before

Instal windows XP part 3

Step 11 - After the setup has completed copying the files the computer will restart. Leave the XP CD in the drive but this time DO NOT press any key when the message "Press any key to boot from CD" is displayed. In few seconds setup will continue. Windows XP Setup wizard will guide you through the setup process of gathering information about your computer.

Windows XP Screenshot - Click to enlarge
Step 12 - Choose your region and language.
Windows XP Screenshot - Click to enlarge
Step 13 - Type in your name and organization.
Windows XP Screenshot - Click to enlarge
Step 14. Enter your product key.
Windows XP Screenshot - Click to enlarge
Step 15 - Name the computer, and enter an Administrator password. Don't forget to write down your Administrator password.
Windows XP Screenshot - Click to enlarge
Step 16 - Enter the correct date, time and choose your time zone.
Windows XP Screenshot - Click to enlarge
Step 17 - For the network setting choose typical and press next.
Windows XP Screenshot - Click to enlarge
Step 18 - Choose workgroup or domain name. If you are not a member of a domain then leave the default settings and press next. Windows will restart again and adjust the display.
Windows XP Screenshot - Click to enlarge


Instal windows XP part 2

Step 7 - You will be presented with the End User Licensing Agreement. Press F8 to accept and continue
Windows XP Screenshot - Click to enlarge
Step 8 - This step is very important. Here we will create the partition where Windows will be installed. If you have a brand new unformatted drive you will get a screen similar to below. In our case the drive size is 8190MB. We can choose to install Windows in this drive without creating a partition, hence use the entire size of the drive. If you wish to do this you can just press enter and Windows will automatically partition and format the drive as one large drive.
However for this demonstration I will create two partition. The first partition will be 6000MB (C: drive) and second partition would be 2180MB (E: drive). By creating two partition we can have one which stores Windows and Applications and the other which stores our data. So in the future if anything goes wrong with our Windows install such as virus or spyware we can re-install Windows on C: drive and our data on E: drive will not be touched. Please note you can choose whatever size partition your like. For example if you have 500GB hard drive you can have two partition of 250GB each.
Press C to create a partition.
Windows XP Screenshot - Click to enlarge
Step 8 - Windows will show the total size of the hard drive and ask you how much you want to allocate for the partition you are about to create. I will choose 6000MB. You will then get the screen below. Notice it shows C: Partition 1 followed by the size 6000 MB. This indicates the partition has been created. We still have an unpartitioned space of 2189MB. Next highlight the unpartitioned space by pressing down the arrow key. Then press C to create another partition. You will see the total space available for the new partition. Just choose all the space left over, in our case 2180MB.
Windows XP Screenshot - Click to enlarge
Step 9 - Now you will see both partition listed. Partition 1 (C: Drive) 6000MB and Partition 2 (E: Drive) 2180MB. You will also have 8MB of unpartitioned space. Don't worry about that. Just leave it how its is. Windows normally has some unpartitioned space. You might wonder what happened to D: drive. Windows has automatically allocated D: drive to CD/DVD-ROM.
Select Partition 1 (C: Drive) and press Enter.
Windows XP Screenshot - Click to enlarge
Step 10 - Choose format the partition using NTFS file system.This is the recommended file system. If the hard drive has been formatted before then you can choose quick NTFS format. We chose NTFS because it offers many security features, supports larger drive size, and bigger size files.
Windows XP Screenshot - Click to enlarge
Windows will now start formatting drive C: and start copying setup files as shown on the two images below :
Windows XP Screenshot - Click to enlarge


Instal windows XP part 1

How to Install Windows XP

This procedure demonstrates how to install Windows XP Professional. The procedure to install Windows XP home edition is very similar to the professional edition. Since Windows XP Pro is more advanced operating system, it will be used to demonstrate the installation procedure.
The best way install Windows XP is to do a clean install. It is not difficult to perform a clean installation.
For any other tipe of windows please see Windows help (VISTA,WINDOWS 7, etc)
Step 1 - Start your PC and place your Windows XP CD in your CD/DVD-ROM drive. Your PC should automatically detect the CD and you will get a message saying "Press any key to boot from CD". Soon as computer starts booting from the CD your will get the following screen:
Windows XP Screenshot - Click to enlarge
Step 2 - At this stage it will ask you to press F6 if you want to install a third party Raid or SCSI driver. If you are using a an IDE Hard Drive then you do not need to press F6. If you are using a SCSI or SATA Hard drive then you must press F6 otherwise Windows will not detect your Hard Drive during the installation. Please make sure you have the Raid drivers on a floppy disk. Normally the drivers are supplied on a CD which you can copy to a floppy disk ready to be installed. If you are not sure how to do this then please read your motherboard manuals for more information.
Windows XP Screenshot - Click to enlarge
Step 3 - Press S to Specify that you want to install additional device.
Windows XP Screenshot - Click to enlarge
Step 4 - You will be asked to insert the floppy disk with the Raid or SCSI drivers. Press enter after you have inserted the disk.
Windows XP Screenshot - Click to enlarge
Step 5 - You will see a list of Raid drivers for your HDD. Select the correct driver for your device and press enter
Step 6 - You will then get a Windows XP Professional Setup screen. You have the option to do a new Windows install, Repair previous install or quit. Since we are doing a new install we just press Enter to continue.

Tuesday 28 February 2012

Computer running too slow ..

why your computer runnng too slow...

Symptoms Probable Causes Solution Find
Lack of disk space System is bloated Cleans up your PC from over  click on start/accesories/
 General system

system tools /disc cleanup
 Slow down

or you can search in 

 with junk files. 70 different types of junk files. your browser disc clean up 
Slow program start-ups Files and free space Defragments and  Click on start/accessories/


re-arranges files to system tool/disc defragment


 ensure the most or you can search in
Poor responsiveness  are fragmented.  efficient file placement.  browser disc defragment
System errors Windows registry  Cleans up obsolete You can find in your browser
Random program failures contains obsolete   records, fixes corrupt  "registry fix program download"

or corrupt records.  references and copy and installed, run it. 


 defragments the registry.
Windows takes too long to load Various programs set  Allows you to Click on start/start up menus

 themselves to start   disable programs   you can able

on boot automatically. from starting up  or


 when your PC boots. disable the program
Slow Internet browsing  Windows uses preset  Optimizes Windows  Click on start/ control panel/
 and download speed settings that are not  settings specifically  internet connection / 

optimized for  for the type of Internet  then delete cookies

your connection type. connection you use.  or clean history


Updating add-ons for a new application version of MOzilla fire fox


 Mozilla add-ons is an application you can take from mozilla to  upgrade the perform of mozilla untility.
1.Click on your mozzila beowser tool tab, find add ons
2. they will shown like this:

[edit]


Get Add ons, is the list new add ons, you can choice with click and put the add ons on your mozilla browser utility, like translator, picture editor etc
Extensions, is the list that add ons have been installed on your computer , if you don't use or like the add ons you can dissable or maybe uninstal
Themes, in themes tab, you can  changes you mozilla fire fox image background(click get themes,choice what themes you like)
Pluggins,is the list all your add ons mozilla firefox, if your mozilla running too slow because there is many add ons you can disable them first ,and make it able after the mozila firefox  open the browser finished

Sunday 26 February 2012

wisget 2: all widget for your site


 www.zoopy.tk internet multimedia >>>find your widget here


MyBlogLog’s Recent Readers – this widget can easily be called a hit amongst blog owners; its popularity even managed to convince Yahoo into buying MyBlogLog. The widget lets you see the avatars of recent visitors to your blog, provided they’re also members of MyBlogLog. Mashable – get the latest social networking news from this very site.
Flickr Flash Photo Stream Badge – display images from your Flickr profile with a handy Flash photo stream.
Preview Anywhere – see a live preview of outgoing links in a small popup which activates on mouseover. Some find this annoying, while others might find it useful.
Twitter Badge – if your life is so interesting that everyone must know what you’re up to all the time, then a Twitter badge is the ideal counterpart to your blog. It’ll proudly displays your recent tweets.
Digg News – display the latest Digg links on your blog. Themeable and fully customizable.
FEEDJIT – real time traffic data directly in your blog’s sidebar.
LineBuzz – inline comments for your blog. Very handy for blogs with frequent lively discussions.
Flixn – display a stream directly from your webcam, so your blog visitors can always see what you’re up to.
    Flixn
3Jam – lets your visitors send messages to your mobile phone, without them knowing your phone number.
Jaxtr – with Jaxtr, your visitors can actually call you to your mobile phone; again, your number stays private.
LinkedInABox – show off your LinkedIn profile. Perfect for personal blogs.
Box Widget – enable visitors to use box.net’s online storage directly on your web site.
Price of gas – displaying gas prices on your blog might seem unnecessary to some, but it’s cool if you have a traffic/travel related blog.
iBegin Weather Widget – Display weather information in your sidebar. Just like with Price of Gas, works great with travel-related blogs.
ClockLink – display time in various time zones with these nifty Flash clocks.
Film Loops – display the latest loops from your FilmLoops account.
Daily Painters – display paintings from famous painters on your blog.
WhoLinked – show your visitors which sites have recently linked to your web site. Works with all major blog platforms.
Criteo AutoRoll – displays links to blogs similar to your blog.
Bitty Browser – embed a cute, fully functional mini web browser to your blog.
Leafletter – create a mini website and embed it into your blog.
    Leafletter
WikiSeek – search Wikipedia with this simple widget.
FeedCount – show off the number of visitors to your blog with this handy little button.
Technorati Link Count – display the number of links your website has from one of the biggest blog authorities – Technorati.
MyPageRank – another good way to show how “big” your blog is is to show off your Google PageRank.
CheckPageRank – in addition to showing your PageRank, this widget also shows your Alexa ranking.
BlinkxIt – embed a link to related videos directly into your website.
Skype button – display your Skype online/offline status on your blog.
RockYou Horoscope – not something I would personally use, but some people are into horoscope. Hell, most people are into horoscope. Anyway, this widget shows horoscope (doh!) and does it in a nicely designed colorful box.
    Horoscope
del.icio.us Tagometer – display how many times have del.icio.us users saved your page.
del.icio.us Linkrolls – this badge shows your latest bookmarks from del.icio.us.
Timelines – need to create a timeline? Seek no further. This widget makes it really easy.
PollDaddy – PollDaddy lets you create beautiful polls in no time, and display them at your blog.
Vizu – another poll-making widget, compatible with all major blog platforms.
AnswerTips – display definitions from Answers.com for various terms on your blog. The definitions are shown in bubbles which are activated on doubleclick.
AnswerBoxes – give your visitors a chance to enter a term themselves, and get a definition from Answers.com
Now Playing – if you got to share your current playlist contents with the world, Sigamp will do the trick. Works with most popular music players, including Foobar, Winamp, iTunes and others.
BuzzBoost – display headlines from your RSS feed on any website.
LibraryThing – show off the latest books you’ve been reading.
Plaxo Address Book – let your most faithful visitors access their address books direclty from your site.
    Plaxo
AuctionAds – a widget that displays auctioned items on eBay, and gives you a percentage of the price paid when sometimes buys an item.
aStore – similar to AuctionAds, only for Amazon. Create a mini-store on your site and receive profit when someone buys an item through your store.
Plazes – show your current location on a Plazes map.
Stockalicious – track your portfolio with this widget, and share it with others. Let everyone know how much money you’ve lost.
Yahoo! For Good – create a charity badge and ask for donations for a worthy cause.
Giftspace – your friends never know what to buy you for birthday? Let them know what you really want with this nifty widget.
MixMap – see where are the visitors to your MySpace profile from on a map.
    MixMap
Google Map Widget – display a searchable Google Map on your website.
Google Video Search – add a video search form and selected videos to your web site.
Odeo player – display an Odeo player for and podcast right there in your sidebar.

widget 1: chat for your site

here the list of several chat widget for your site, and easy to use it for your site. Improve your site and get more interative sith this widget


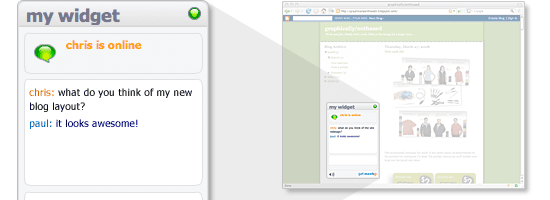
1. Chatango

Chatango
Chatango is a customizable chat room add-on that anybody can install in their website. The main advantage of using this website chat widget is that users can have their own avatar. It also offers different user roles that give participants privileges for becoming moderators and administrators.

2. Meboo.me

Meboo.me
Meboo.me is a product of Meebo.com — a popular web-based IM platform service. Whether you are using Typepad, Blogger or WordPress, Meebo.me is just ideal for any of these platforms. The most advantageous part of adding a Meebo.me chat box in your webpages is that it is compatible with Gtalk, Yahoo! Messenger, AIM, as well as with Facebook. Hence, the visitors of your website do not need to register to interact through it. They can use their existing Gtalk or Facebook username to stay in touch with your website.

3. JWChat

JWChat
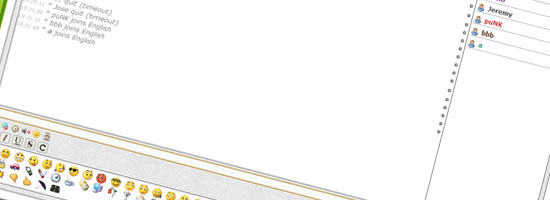
JWChat is an Ajax-powered chat script. It only uses JavaScript and HTML, making it an ideal solution for those who want to quickly get a chat widget up and running. It functions like a traditional IM client, with system sounds notifying you of events like if someone sent an IM, support for emoticons, and more.

4. CBox

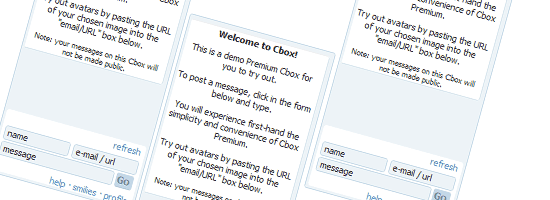
CBox
CBox attempts to merge the features of traditional desktop IM clients with the benefits of the social web. The user interface is straightforward, the installation is a snap, and is plug-and-play because it only relies on client-side JavaScript and HTML. CBox is free, but there is a premium version available for $2.00 a month with additional features like bigger bandwidth, no ads displayed, and custom word filters.

5. Mibew Web Messenger

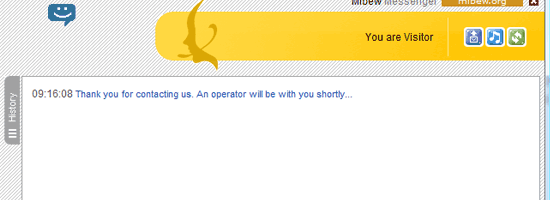
Mibew Web Messenger
Mibew Web Messenger, which also calls itself Open Web Messenger, is a free and open source chat messenger that was built with PHP and MySQL. This chat application was developed with live customer support in mind, but works well in other contexts.

6. AjaxChat for WordPress

AjaxChat for WordPress
This free website chat script is a plug-in for adding live chat functionality to a WordPress installation. It enables WordPress users to chat with other visitors on your blog without refreshing the browser.

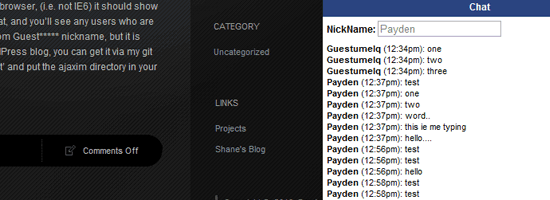
7. AJAX Chat

AJAX Chat
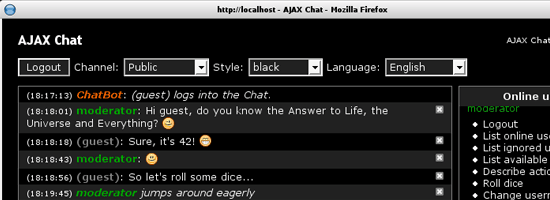
As you can probably conclude by its name, AJAX chat uses client-side JavaScript to enable you to run a robust chat client on your website. It can also be used as a shoutbox, a site feature that allows your visitors to quickly leave a message and "shout out" to other visitors and the site admins.

8. phpFreeChat

phpFreeChat
This free PHP-based chat system is highly customizable and is packed with features you’d only expect in desktop clients. It supports the ability to create multiple chat rooms, private messages, custom themes using CSS, and Ajax for a smooth and seamless user experience.

Social Icons

LinkWithin

Related Posts Plugin for WordPress, Blogger...

supeclix